Signing up for a Farm Share or CSA share
Have you considered signing up for a farm share or CSA share, but not sure what to do with all those vegetables? Then you’re in the right place because I have some awesome ideas for how to use CSA vegetables!
Signing up for a farm share or CSA is one of the best ways to guarantee a higher nutrient density in your foods. By purchasing your food from local farmers you are supporting both your body and your local community.
We’ve been on the CSA bandwagon for many years now, and I have a good amount of tricks for how to use up all your veggies every week! Don’t let them sit around and rot in the back of your fridge, read on for all the best ways to use your organic vegetables!
So let’s get to what exactly is a CSA and practical uses for your CSA share!
Skip to Tips to Use up the Vegetables
What is a farm share? What is a CSA?
A farm share, also called a CSA, meaning Community Supported Agriculture, is your way of supporting local farmers! Typically you pre-pay for a certain amount of time, and get vegetables, fruits, and sometimes eggs or meats, delivered or picked-up on a weekly basis.
By signing up for a CSA you are guaranteeing a set revenue for the farm. You are invested in their yields and hopefully getting to know your local farmer.
This generally means that every week you get a selection of the freshest vegetables, that have been picked that week! Can’t get better than that!
Signing up for a Farm Share or CSA
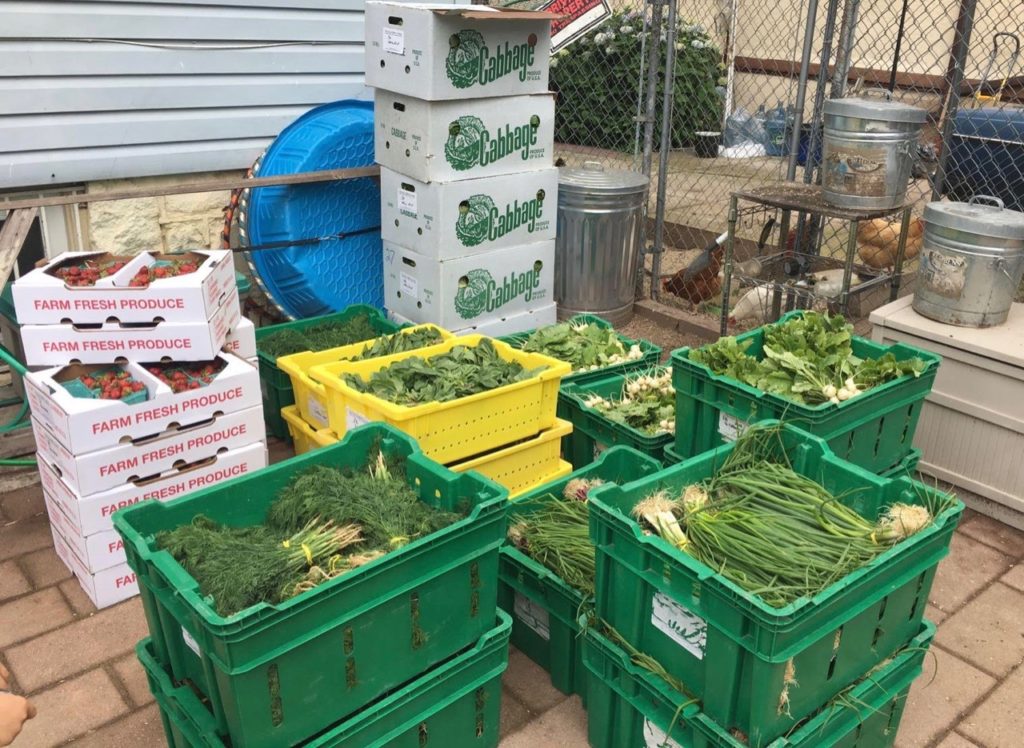
Signing up for a farm share is usually pretty straightforward. In my experience, the best way to find a convenient local farm share is to ask your neighbors! Often times small farms do not do a lot of marketing and rely on word of mouth; they are busy growing all that food for you!
How to Find a CSA
The next best way to find a farm share, is to get online and go to a database like LocalHarvest.org, to find local farms. Many farms, have seasonal sign-ups where you get weekly shares delivered for a certain number of months. While others do make a la carte CSA boxes available as well.
Either way, I highly suggest talking to the farmer to find out about their growing practices. The gold standard is regenerative agriculture, combining animal and plant farming together to fortify the soil and produce high quality foods.
Many small farms follow organic farming methods to minimize use of pesticides, but do not have official organic certification (because it is quite costly) for them.
CSA Health Benefits
Eating locally and seasonally helps to bring your body into balance with the outdoor environment. You will find more coherence in your life by aligning the sunlight, water, and temperature of your foods with the ones that you are experiencing.
This may be a very different way of looking at things. However, when you realize that YOU are part of nature, you also realize that to heal your body requires connecting with nature both inside and out.
Why Support Local Food
If the health benefits weren’t enough, it is also important to mention that local farms minimize transportation costs and support your local economy. Here are a few more reasons to support local food!
1. Fresh and Tasty
First of all, getting the freshest produce tastes better! Much, much better! It’s healthy for our bodies to eat seasonally, and choosing local helps ensure we are in sync with our surroundings. Plus, the vegetables are much fresher and have more nutrients in tact than what we can get at a grocery store.
2. Help preserve plant diversity
Local farms help to preserve genetic diversity of foods. Large farms tend to choose varieties based on their ability to be machine harvested, shipped without bruising, and longer shelf life. We had never tried so many different types of greens until we joined a farm share!
3. Support your local community
Local food supports local farms and their families! This helps to build community and preserves open spaces as farmland.
4. Protect the environment
Local food supports the environment. A farm that uses cover crops to prevent erosion, also replace nutrients in the soil and helps to capture carbon! Not to mention all the emissions we prevent by not purchasing food that has been shipped half way around the world!
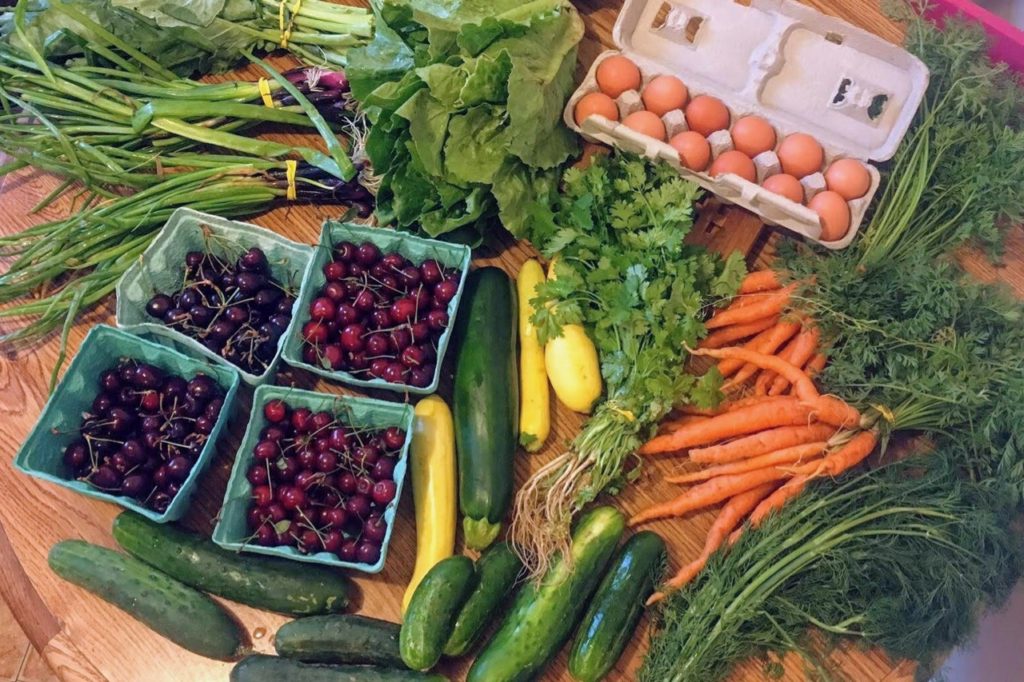
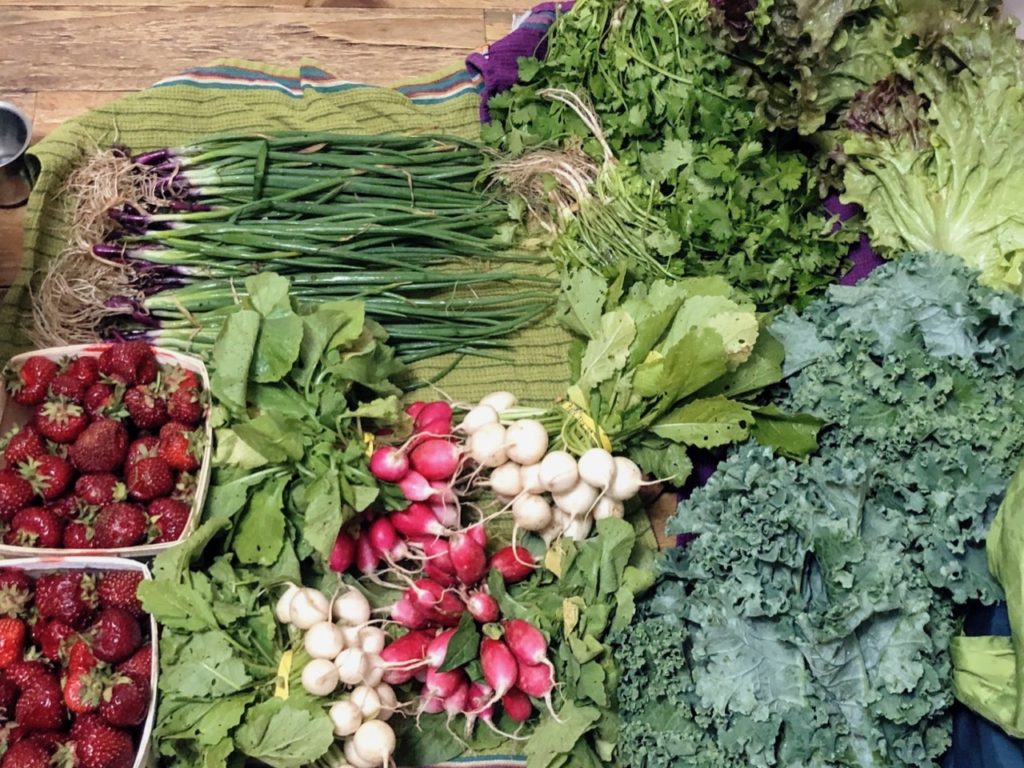
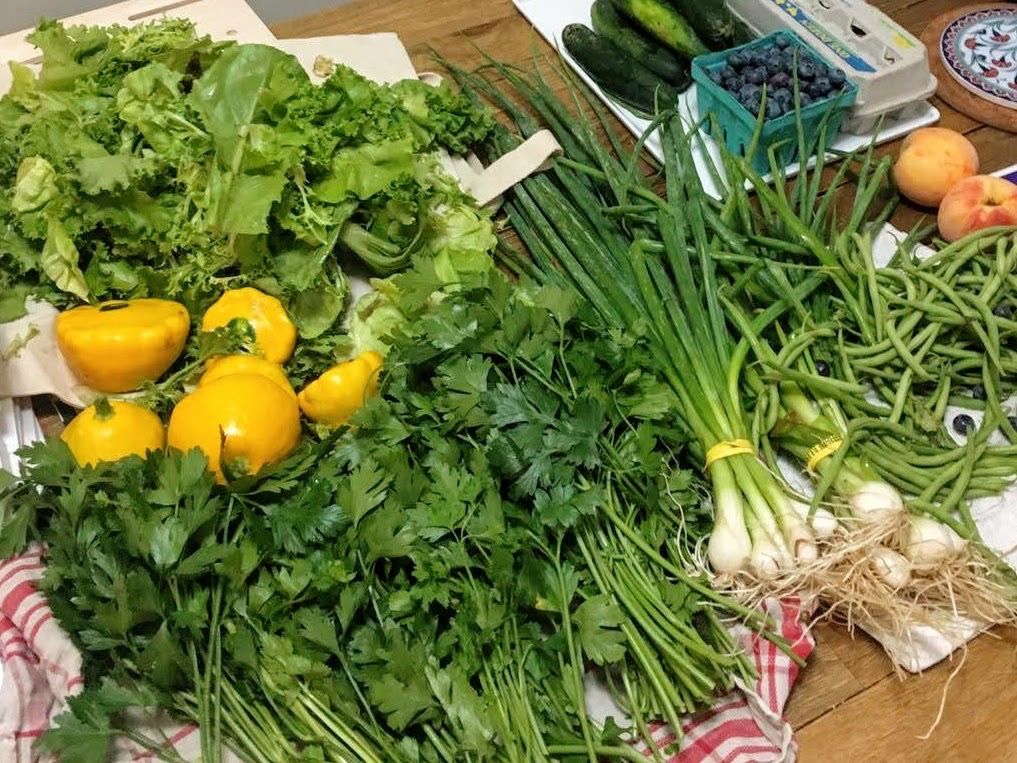
How to Use Farm Share Vegetables
So you signed up for a farm share or CSA share and now you’re wondering what to do with all those familiar and not-so-familiar greens. No worries! We’re going to figure it out together!
If it’s your first time getting a farm share, getting a huge assortment of seasonal vegetables can be overwhelming. You may also notice some greens or root vegetables that you haven’t seen before.
Because we don’t get to choose what vegetables we get, this is where a farm share membership becomes tricky. Fear not, after figuring out this farm share business for the last few years, there is a method to the madness.
1. Survey Your Goods and Make a Plan
Figure out, what vegetables need to be eaten first, and which ones can wait for later in the week. Leafy greens and other time sensitive veggies first. But even among those, there is a hierarchy.
For example, if you get radishes or turnips with greens attached, those greens need to be eaten first! The bulbs can stay in the fridge for later in the week. Lettuce, arugula, and spinach will keep for a week, but the sooner you eat them the better. Kale and collards are more hardy and can wait for later in the week!
If you get root vegetables, those keep for a while. Hardy veg like the butternut squash will last for weeks, even months and don’t need to be refridgerated.
2. Prepare your Least Favorite Veggie First
Inevitably, you will get some vegetables that aren’t your favorite. When that happens, use it up that very first day. Don’t even let it enter the fridge! Just take care of it. Because every day that passes you are less likely to make it.
Then what was a perfectly good, fresh radish becomes a wilted mushy mess in the back of your fridge, that you feel bad about and don’t want to toss. Until it’s several weeks later and you end up tossing it anyway. (Ask me how I know)!
There is always some way to use a vegetable you don’t like: blend it up into a soup where you can’t taste it, try a new recipe that you’ve never had before, or chop it up to be pickled. If you still can’t handle it, give it away to a neighbor while it’s still fresh!
3. Use Your Freezer
Because you are getting vegetables during the season when they are picked, there will be some weeks you get way too much of one specific type.
Let’s say you will be going away on vacation and you don’t have time to use up everything you got. You always have the option of giving it away, but if not, it’s time to use your freezer for storage.
You can freeze lots of things; fresh broccoli isn’t one of them.
- Fresh herbs: wash, dry, freeze.
- Fresh fruit: wash, cut for smoothie convenience, freeze.
Other veggies, like the broccoli I mentioned above need to be cooked (blanched) before freezing. For me that means I put it on the menu for roasting and eating instead.
Here is a list of how to freeze most vegetables.
4. Garlic and Salt are your best friends
Use your know-how of Google, or Pinterest to find some recipes. If all else fails: olive oil or butter, salt and garlic. You can not go wrong.
Greens can always be sautéed with butter and garlic. Basically every and any vegetable can be roasted in the oven with olive oil, salt and garlic. Bonus, the healthy fats help you to absorb the vitamins in your veggies!
Worst case, you let a veggie get too soft and you don’t want to throw it away, stick it in a pot with broth for a warm soup. And, you guessed it, add some salt and garlic!
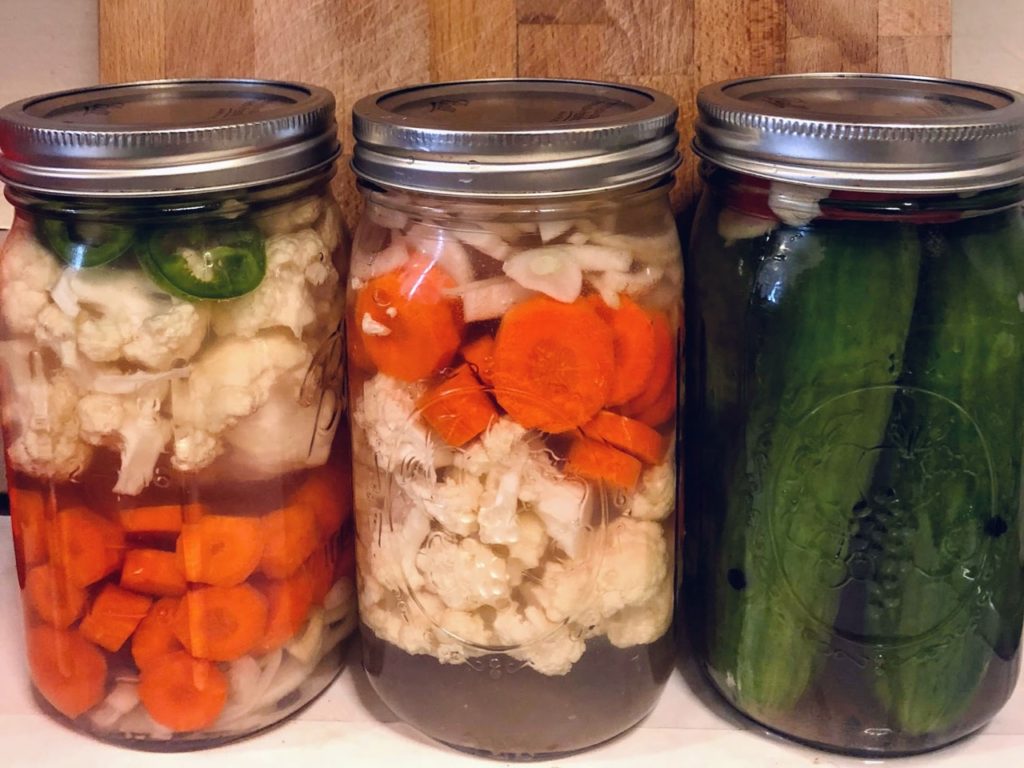
5. Pickling or Fermenting
Another way to keep your vegetables is through fermentation! It’s an easy fix to too many fresh veggies and especially for rescuing those you don’t love. *cough* Turnip *cough*.
A basic formula for lacto-fermented veggies is 1 Tablespoon salt to two cups water. Thankfully, this fits perfectly in a 32 oz mason jar, together with your whole or chopped vegetables! You are of course free to add other herbs and spices for flavoring, dill, garlic, peppercorns, etc.
Lacto-Fermented Vegetables
Ingredients
- 32 oz mason jar filled with vegetables
- 1 Tablespoon real salt (Himalayan Salt, Celtic Salt or Sea Salt)
- 2 cups filtered water
- Optional: herbs and spices
Method
- Put vegetables in jar and cover with salt and water.
- Shake up to make sure salt dissolves.
- Cover jar. For best practice, leave an inch of space at the top.
- Leave on the counter for several days. If your space is warm, “burp” your jar after 24 hours to release some of the built up pressure.
- Taste after 5+ days. Ferment is ready when it is sufficiently sour to your liking.
- Transfer to fridge, where it can be kept for months.
6. More Tips for Your CSA Share Vegetables
The best way to ensure you eat you CSA share vegetables while they are fresh is to incorporate them into all your meals. A typical day for us would include sautéed greens with breakfast, some type of salad for lunch, and cooked vegetables as a side dish for dinner.
In much the same manner as pickling, canning is also an option. I don’t have personal experience with this, but this looks like a good guide.
A final word: Supporting community agriculture is a wonderful thing! Use it as an excuse to explore new recipes, stretch your tasting palate, and advance your cooking skills! And if all else fails….salt and garlic!
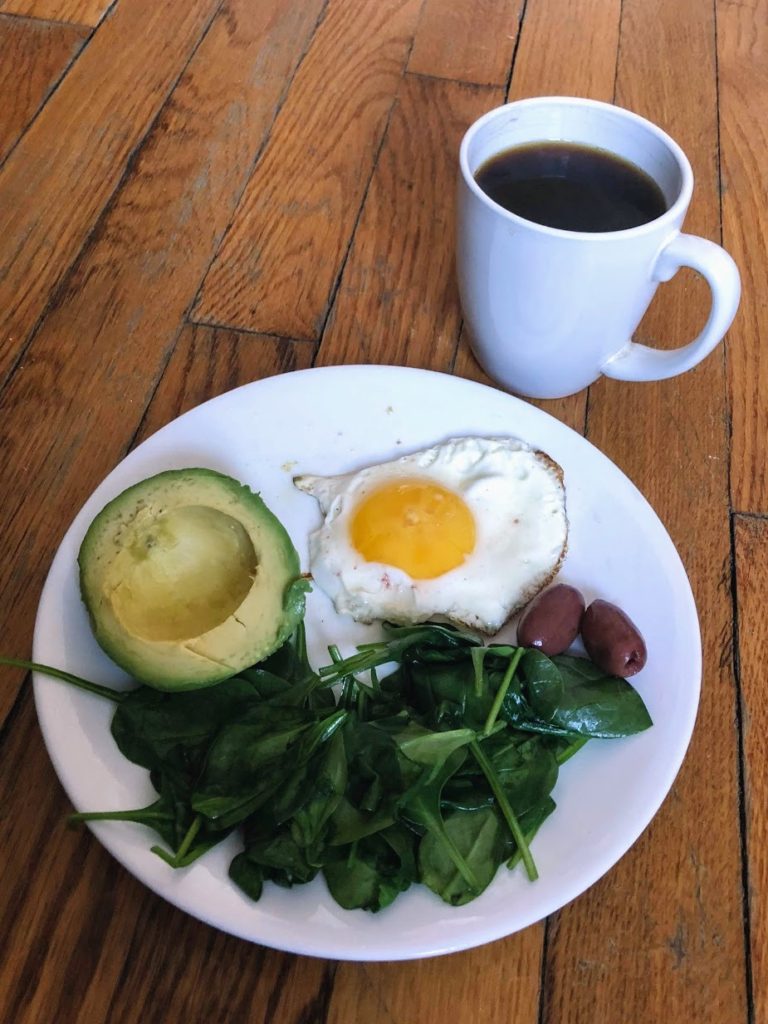
How amazing are those fresh greens for breakfast?!